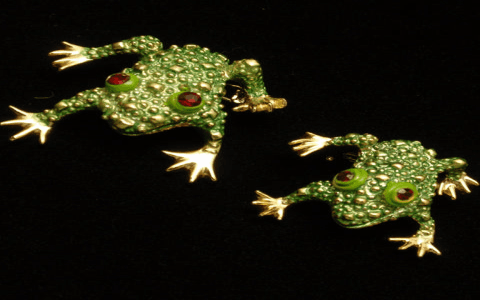
Okay, so, I gotta tell you about this little project I just finished. I made this super cute frog brooch, and I’m kinda proud of how it turned out. It all started when I stumbled upon some old brooches at a vintage store. I have this thing about brooches. They’ve been around since the Bronze Age. And the ones I found were so intricate, and it got me thinking, why not try making one myself?
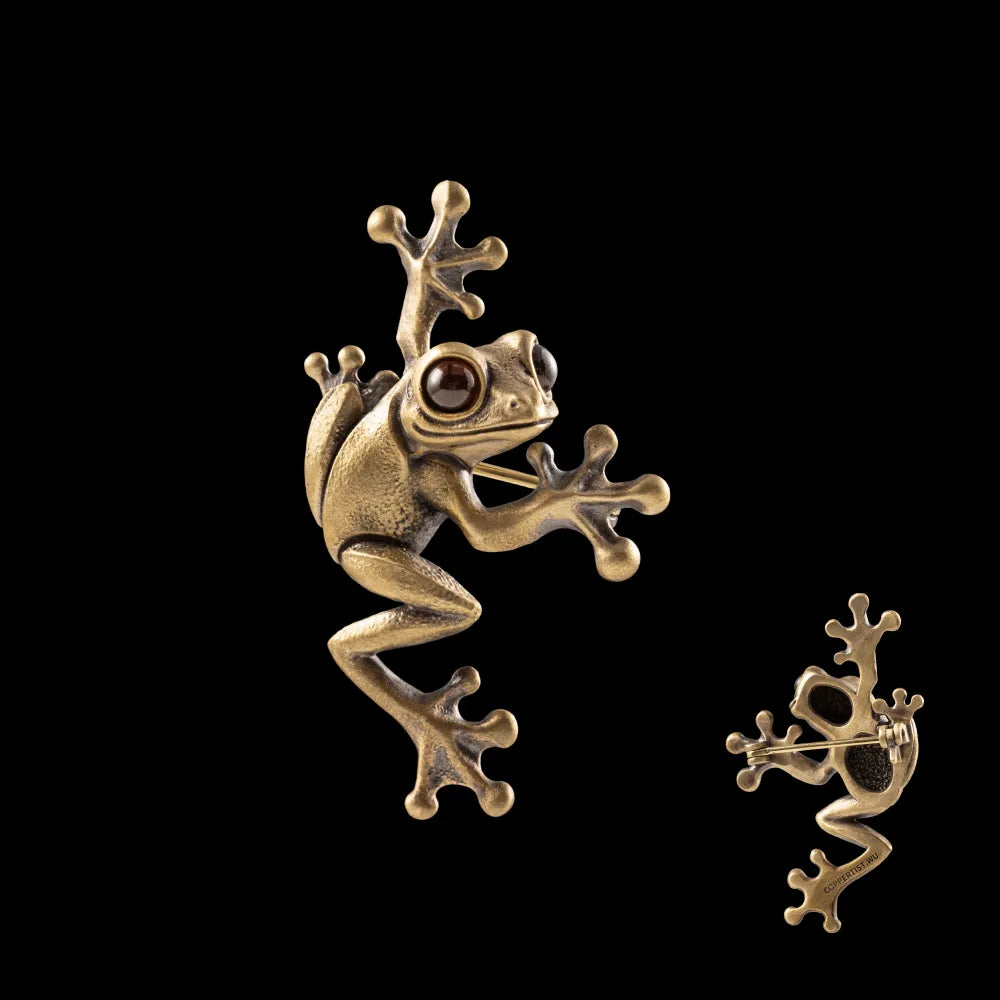
I’ve always been into crafts, you know, the whole DIY thing. So, I picked up some basic jewelry-making supplies. I decided on a frog because, well, they’re just adorable, right? And I had this image in my head of a happy, smiling little frog.
Getting Started
First off, I sketched out a few designs. I’m no artist, but I managed to draw something that resembled a frog. I wanted it to be simple but charming. Once I was happy with the design, I made it into a simple template.
Shaping the Brooch
Next, I needed to shape it. I found some brass-toned metal sheets that seemed just right – not too thick, not too thin. Using some tin snips. Cutting metal is trickier than I thought, but after a few tries, I had a decent frog shape. It was more of a silhouette, really, but you could tell it was a frog.
Adding Some Color
Now, the fun part – color! I wanted my frog to be green, obviously. I picked up some peridot green enamel paint. Applying the enamel paint was a bit messy. I had to do several coats, letting each one dry completely before the next. It took some patience, but the color started to look really vibrant.
The Smiley Face
I wanted my frog to have a friendly face, so I used a fine-tipped black paint pen to draw a smile. It sounds easy, but getting the expression just right took a few attempts. I didn’t want it to look goofy, just genuinely happy.
Attaching the Clasp
This was probably the most challenging part. I had to attach a brooch clasp to the back. I learned there are different types of clasps – C clasp, T-bar, and a few others. I went with a simple C clasp because it seemed the easiest for a beginner like me. I used a strong adhesive to secure it to the back of the frog. It wasn’t perfect, but it held pretty well.
The Final Touches
After everything was dry and set, I added a clear sealant over the enamel to give it a nice, glossy finish. It also helps protect the paint from chipping. And just like that, my frog brooch was done!
It’s not perfect, a bit rough around the edges, but I made it. It’s got this rustic charm to it. I’ve worn it a couple of times, and people seem to like it. I even got a few compliments! It’s a nice feeling to wear something you’ve made yourself. Plus, it’s a great conversation starter. Every time someone asks about it, I get to tell this whole story.
- First, I drew a design.
- Then, I cut the metal.
- Next, I painted the frog green.
- After that, I added a smiley face.
- Finally, I attached the clasp and sealed it.
So, yeah, that’s my frog brooch story. It was a fun little adventure, and I’m already thinking about what to make next. Maybe a star-shaped brooch. Or a ring brooch. Or perhaps something heart-shaped. Who knows? The possibilities are endless!